How to assign the Integration Hub licenses to your application
To assign the subscription license to the Integration hub application, perform the following:
2. Select the template to which you would like to assign the license.
Let’s take an example of Shopify template to assign the license.
Perform the steps as mentioned in the Setting Up Shopify in the Integration Hub section in this guide completely and during deployment, the application prompt you to provide the license details.
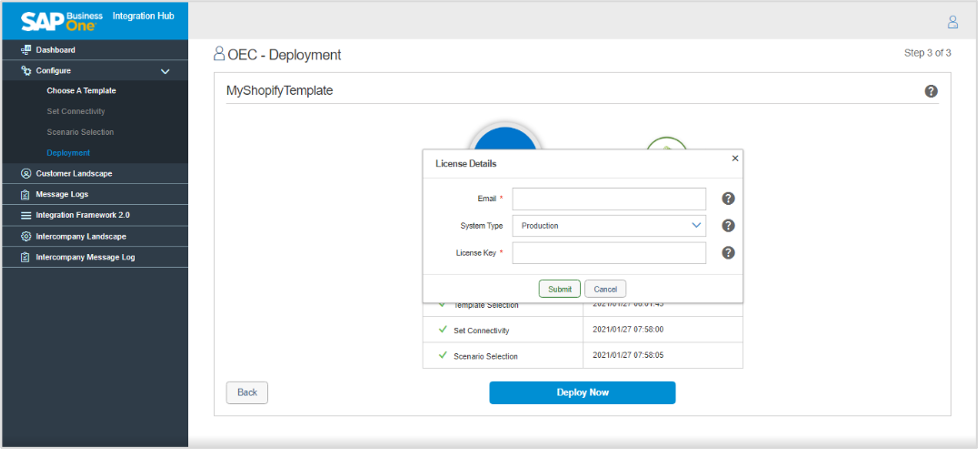
3. Enter the Email, System Type and License Key information and choose the Submit button.
The application validates the license information, if all entered information is correct the Integration Hub displays the license activation message and subsequently shows the Deployment Results window. Otherwise, the application will show you the appropriate license error.
4. The checkboxes in the Deployment Results window indicate the deployment status. choose the OK button.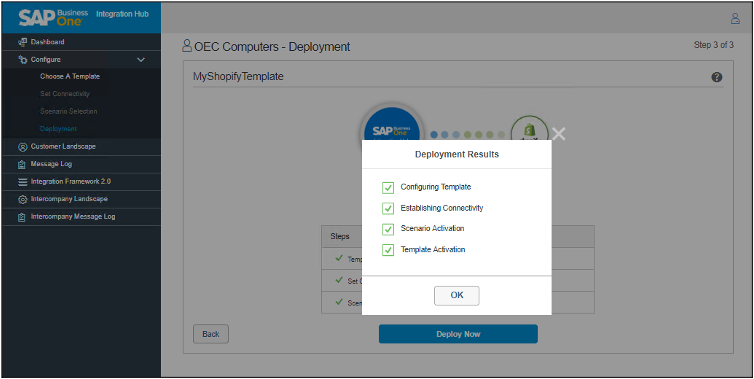
 Note
Note
1. In the Integration Hub Administration Console, in the Dashboard menu, in the Customers area, choose the Add New Customer button. For more information, see Adding New Customers.
Perform the steps as mentioned in the Setting Up Shopify in the Integration Hub section in this guide completely and during deployment, the application prompt you to provide the license details.
The License Details window contains the following fields:
Field Name | Description |
Enter the email address on which you receive the license keys. Email is a mandatory field | |
System Type | Select the System Type – Production or Sandbox from the drop down list. Choose the appropriate system type as mentioned in the license email. |
License Key | Enter the License key received in the email. License Key is a mandatory field |
The application validates the license information, if all entered information is correct the Integration Hub displays the license activation message and subsequently shows the Deployment Results window. Otherwise, the application will show you the appropriate license error.
4. The checkboxes in the Deployment Results window indicate the deployment status. choose the OK button.
Similarly, you can assign the licenses to other Integration Hub applications.
To manage the license you need Internet on the machine where you are activating/deactivating the Walldorf License. In case you have restricted access, please whitelist the URL - https://hooks.walldorfsolutions.com