Step 1 – Set Connectivity of Salesforce in the Integration Hub
- Choose the SAP Business One SLD to provide the connection between SAP Business One System Id and Salesforce Id.
Note
By default, the solution displays all the SAP Business One SLDs available in SLD Category selected during customer creation.
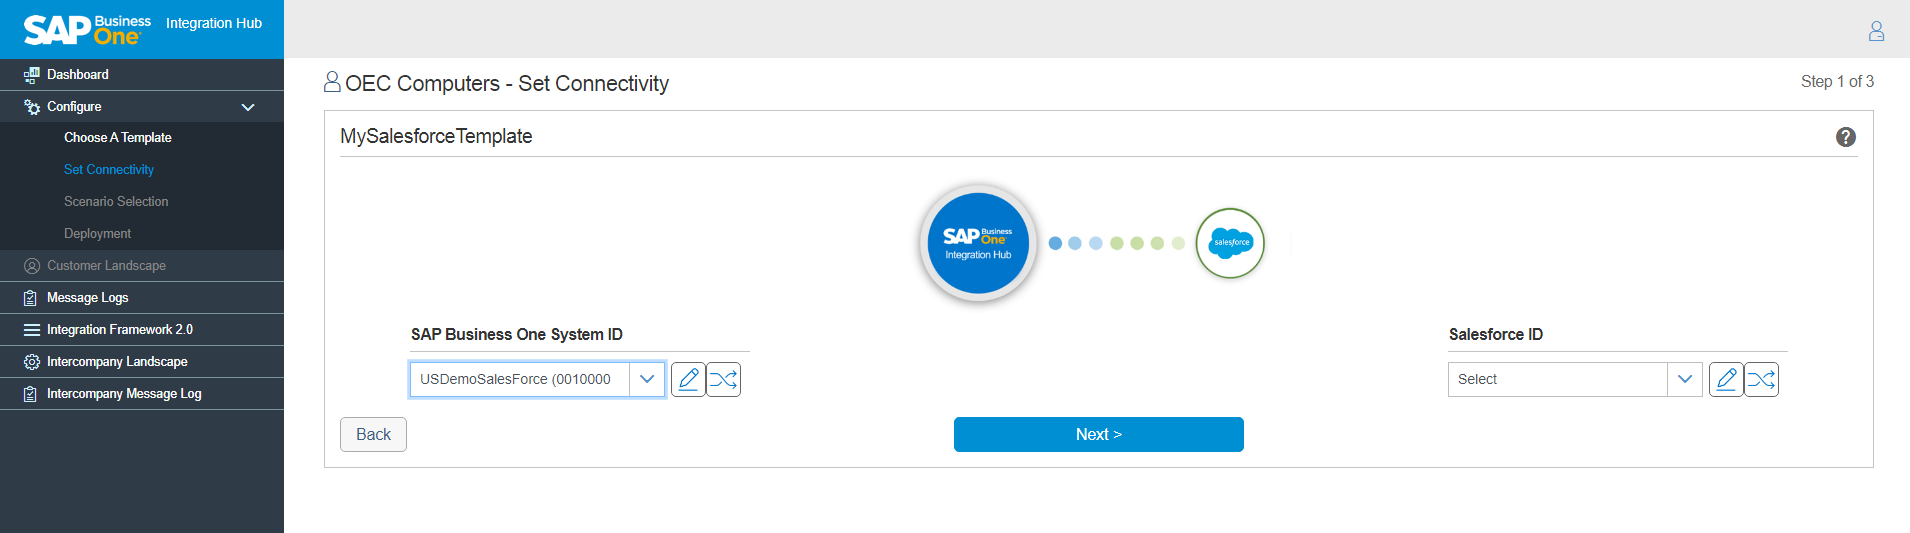
- To add a new SLD or edit existing SAP Business One SLD under SAP Business One System Id area, choose
Add / Edit button.
The SAP Business One Connection Details window contains the following fields:
Field Name
Description
SLD Category
Displays the SLD Category selected during customer creation. This field is read only.
System Name
SAP Business One Server
License Server
Enter License Server details. i.e. Server Name or IP Address and port number of the SAP Business One License Server.
The default port is 30000.
SLD Server
Database Name
Database Type
Database User
Database Password
Database Port
Enter the port for database.
Username
Password
Enter a valid password for B1i user of SAP Business One.
Language
Select the language from the list of languages.
Is Trust
Select True or False. The default value for this field is False. To use a trusted connection, choose True from the dropdown list.
JcoPath
Enter path for jco library. Example of Installation path of JCO: C:\Program Files (x86)\SAP\SAP Business One DI API\JCO\LIB
DI ProxyHost
DI ProxyPort
The default value of DI Proxy Port is 2099.
Proxy Host
The proxy host is defined in a multi-instance scenario. If the B1i server connects to the SAP Business One server through a proxy server then, enter the address of the proxy server in this field.
Proxy Port
Enter the proxy port in this field.
- Enter the valid data and choose the Submit button. An SAP Business One SLD is created.
Choose the Test Connection
icon to test the connection between the SAP Business One System Id in Integration Hub and the SAP Business One System Landscape Directory.
If the connection is successful, a success message appears “Test Connection Successful”. If the connection is unsuccessful, a failure message appears “Test Connection Failed”. Please provide the correct credentials.
- To add / edit Salesforce instance SLD under Salesforce Id area, choose the
Salesforce Connection Details window appears.
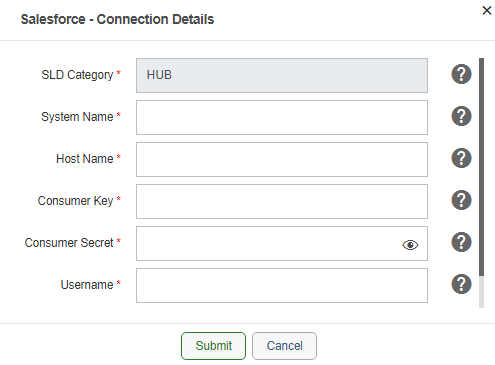
The Salesforce Connection Details window contains the following fields:
Field Name
Description
SLD Category
Displays the SLD Category selected during customer creation. This field is read only.
System Name
Host Name
Enter the Host name of the Salesforce.
The hostname is fully qualified domain name. Click on View Profile in Lightning Experience view and copy the Sales force hostname given below your login name. For example the hostname is ap15.salesforce.com.
Consumer Key
In Salesforce Integration Hub connected App instance go to API (Enable OAuth Settings) and take a note of the Consumer Key.
Consumer Secret
In Salesforce Integration Hub connected App instance go to API (Enable OAuth Settings) and take a note of the Consumer Secret.
Username
Enter the user name to login to Salesforce
Password
Enter the password for the entered username.
The following are configurations that are required to be configured in Salesforce:
- Hostname
The hostname is fully qualified domain name. Click on View Profile in Lightning Experience view and copy the Salesforce hostname given below your login name. For example, the hostname is ap15.salesforce.com.
- Connected Apps
Create Intercompany App on Salesforce for Integration Hub. To create Integration Hub App, go to Build> Create > Apps. Go to Connected Apps on the page and click on New button to Create New Connected App for Integration Hub.
- Consumer Key and Consumer Secret
On the Connected App page enter the basic Information. On API Enable OAuth Settings, Select the check-box Enable for Device Flow if Callback URL is not available. Select and transfer all scopes from Available OAuth Scope to Selected OAuth Scopes and Save the changes in Sales force. This creates a Connected App for Integration Hub. Click on the Integration Hub connected App instance and from API (Enable OAuth Settings) and take a note of the Consumer Key and Consumer Secret.
- Configure API polices
Configure the policies for the API keys created above. Go to Setup> Manage App> Connected Apps. Open the Connected App for Intercompany Hub and Edit Policies >OAuth Policies for IP Relaxation select “Relax IP Restrictions for activated Devices” and Refresh Token Policy to “Expire refresh token if not used for’’ to number of days as per your company policy. Save the Changes.
Caution
If the token remains unused and number of days configured for Refresh Token Policy to “Expire refresh token if not used for’’ lapses then, redeploy the Salesforce template with the updated regenerated Consumer Key and Consumer Secret.
- Provide the valid information in the fields and choose the Submit button. SLD for Salesforce is created.
- Choose the Test Connection
If the connection is successful, a success message appears “Test Connection Successful”.
If the connection is unsuccessful, a failure message appears “Test Connection Failed”.
- Choose the Next button to proceed to Step2.
Next Step: Step 2 – Scenario Selection of Salesforce in the Integration Hub
Related Articles
Salesforce integration with SAP Business One
Salesforce is a cloud computing service as a software (SaaS) company that specializes in customer relationship management (CRM). Salesforce's customer relationship management software instantly streamlines and automates enterprise’s business ...Step 3 – Deployment of Salesforce in the Integration Hub
To deploy the solution, choose the Deploy Now button. The application prompts you to provide the license details. For more information, refer to the Assigning the Integration Hub licenses in the Knowledge Article. The Integration Hub displays ...Step 2 – Scenario Selection of Salesforce in the Integration Hub
The Scenario Selection displays the Scenario, Data Direction, and Field Mapping. By Default, the Data Direction for Lead is not selected. You can select the data direction as per your company policies. Configuration Summary The Configuration ...Setting up Salesforce in Integration Hub
The following are the steps to setup Salesforce in Administration Console: Add New Customer. Refer to section Add New Customer in the Knowledge Article. Select the Salesforce template to integrate. Upon selecting the template, a message “Let’s ...Setup in SAP Business One for Salesforce in the Integration Hub
To check the activation status, choose Administration → Integration Hub →Feature Activation. The Active field should be flagged. The Active checkbox enables for the feature deployed in the Integration Hub. If the flag is not set to active, then ...