Step 3 – Deployment of Shopify in the Integration Hub
- The Integration Hub pre-checks the configurations before the solution can be deployed.
The Configuration Summary table is displayed. If all steps are successful, the solution is ready for deployment.
To deploy the solution, choose the Deploy Now button.
- The application prompts you to provide the license details. For more information, refer to the Assigning the Integration Hub licenses section in this document.
- The Integration Hub displays the Deployment Results window, which indicates whether the deployment is successful or failed. The checkboxes in the Deployment Results window indicate the deployment status.
Note
After you enable the multi-branch function in SAP Business One, you must re-deploy the Shopify Template.
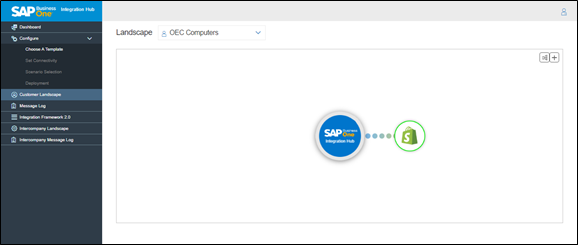
- After all stages in the Deployment Results window are checked, choose the OK button. Deployment of the feature in the Integration Hub enables the features in SAP Business One. The Customer Landscape displays the connection of SAP Business One to Shopify.

- To modify the template after successful feature activation, right-click the Shopify logo on the template.
Right-clicking a template logo displays a window with the following fields:
Field Name
Description
View
Displays the Set Connectivity window in view mode.
Edit
Displays the Set Connectivity window in edit mode.
De-activate
Deactivates the Shopify deployment.
Deployment Status
Displays the deployment status with date and time.
Delete Template
Choose delete template to delete the template. It is an Irreversible action.
Note
On deleting the template, the template will be marked as Inactive in the application deployment status window in SAP Business One.
Delete Deployment Info.
Choose delete deployment info. to delete the complete deployment information of the template. It is an Irreversible action.
Note
On deleting the deployment information, the template will not be deleted from deployment panel screen, it will be deactivated only.
Manage Licenses
Choose Manage License to Activate/Deactivate the integration Hub License. For more information, see Managing the Integration Hub licenses section in this guide.
Related Articles
Setup in SAP Business One for Shopify in the Integration Hub
After deploying Shopify in the Integration Hub, check that the feature is correctly activated in SAP Business One and enter the B1i server details. To do so, perform the following: In the SAP Business One Main Menu, choose Administration → ...Shopify integration with SAP Business One
Shopify is an e-commerce platform that allows users to create online retail stores. This cloud-based platform gives the flexibility to access and run a business from anywhere. Shopify allows users to: Create and customize an online store. Sell in ...Step 2 – Scenario Selection of Shopify in the Integration Hub
The scenarios (for example, Master Data, Transactions) are preselected. For scenarios such as Customer, Product, Order, Reserve Invoice, Incoming Payment, Delivery, Credit Memo, and Outgoing Payment, the direction of integration (i.e. from Shopify to ...Step 1 – Set Connectivity of Shopify in the Integration Hub
1.Choose the SAP Business One SLD to provide the connection between SAP Business One system ID and the Shopify ID. Note By default, the solution displays all the SAP Business One SLDs available in the SLD Category field selected during customer ...Setting Up Shopify in the Integration Hub
To set up Shopify in the Integration Hub Administration Console, perform the following: In the Integration Hub Administration Console, in the Dashboard menu, in the Customers area, choose the Add New Customer button. For more information, see Adding ...