Step 2 – Deployment of Expensify in the Integration Hub
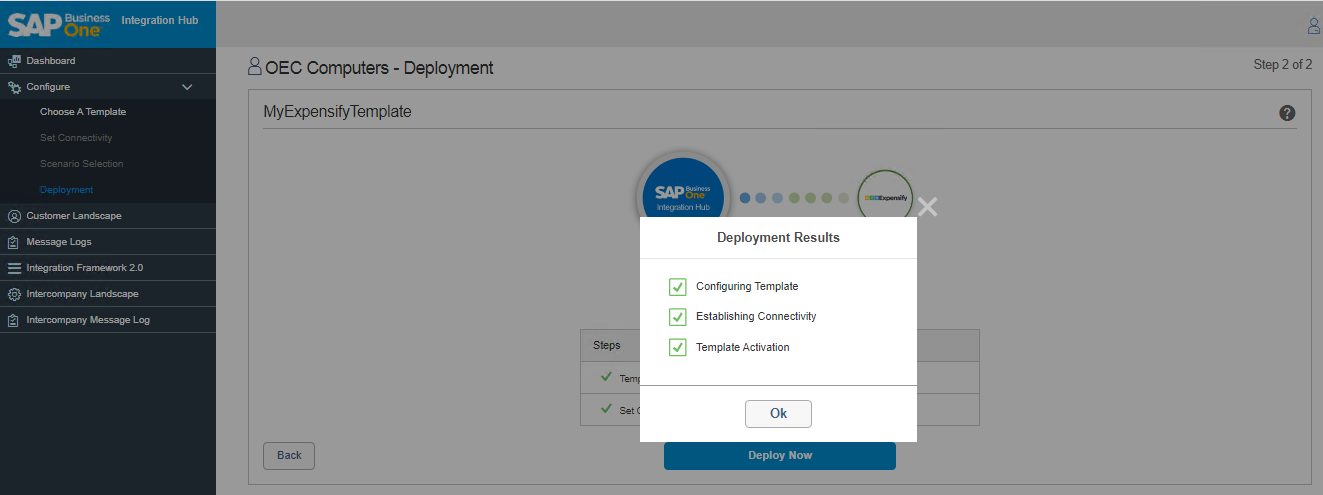
- To deploy the solution, choose the Deploy Now button.
- The application prompts you to provide the license details. For more information, refer to the Assigning the Integration Hub licenses knowledge article
- The Integration Hub displays the Deployment Results whether the deployment is successful or failed. The checkbox in the Deployment Results window displays status of each deployment stage.
Note
After you enable the multi-branch function in SAP Business One, you must re-deploy the Expensify Template.
- Once all stages are checked, click the OK button on the Deployment Results window to proceed. The successful deployment of solution in Integration Hub results in enabling the features in SAP Business One. Customer Landscape displays connection of SAP Business One to Expensify.
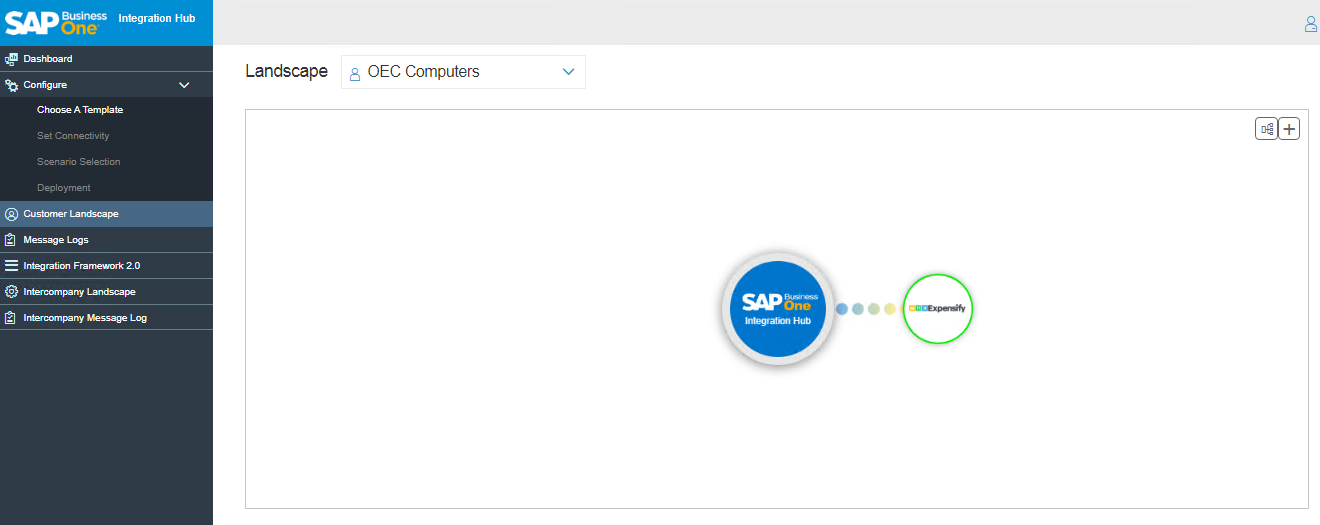
- To modify the template after successful feature activation, right click on the logo of the template.
- Right click on the Expensify logo displays window with the following fields:
Field Name
Description
View
Displays the Set Connectivity window in view mode.
Edit
Displays the Set Connectivity window in Edit mode.
De-activate
Deactivates the Expensify deployment.
Deployment Status
Displays the deployment status with date and time.
Delete
Manage Licenses
Choose Manage License to Activate/Deactivate the integration Hub License. For more information, see Managing the Integration Hub licenses knowledge article.
Next Step: Setup in SAP Business One for Expensify in the Integration Hub
Related Articles
Expensify integration with SAP Business One
Expensify is a cloud-based business accounting system designed to manage expenses and transactions using real-time data processing. Expensify automates the receipt and expense management process. Caution Expensify integration with SAP ...Setup in SAP Business One for Expensify in the Integration Hub
In the SAP Business One Main Menu, choose Administration → Integration Hub → Application Deployment Status. The Deployment Status field should display 'Active', indicating that the feature is deployed in the Integration Hub. If the status displays ...Step 1 – Set Connectivity of Expensify in the Integration Hub
Choose the SAP Business One SLD to provide the connection between SAP Business One System Id and Expensify Id. Note By default, the solution displays all the SAP Business One SLDs available in SLD Category selected during customer creation. To ...Expense Category Settings of Expensify in the Integration Hub
Configure the Expense Category Settings tab in the Expensify Settings window. Click on Retrieve Expense Category to map SAP B1 Expense Types to Expensify Categories. Note The Expense Type Setup in SAP Business One must be created prior to clicking on ...Synchronization of Expensify in the Integration Hub
The following two methods are available for synchronizing data between SAP Business One and Expensify: Manual Synchronization If you want integrations to be performed immediately (instead of waiting for the SCHEDULER services run), choose the Sync ...